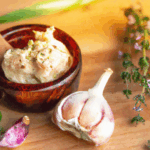
Fermented Roasted Garlic Spread
There’s something magical about the transformation that happens when garlic is roasted. The sharp, pungent flavor mellows into a sweet and nutty richness that delights the taste buds. To take this culinary experience one step further, we present to you our recipe for Fermented Roasted Garlic Spread. The fermentation process not only enhances the flavors but also adds a subtle tang that complements the sweetness of the garlic. This versatile spread can be used in so many ways – on crusty bread, as a dip for veggies, or stirred into soups and stews. Let’s dive into creating this delicious and probiotic-rich spread.
**Fermented Roasted Garlic Spread**
**Ingredients:**
– 2 heads of garlic
– 1 tablespoon olive oil
– 1/2 teaspoon sea salt
– 1/4 teaspoon black pepper
– 1/4 teaspoon red pepper flakes (optional)
– 1 tablespoon honey
– 1 tablespoon whey (strained from yogurt) or 1 tablespoon of brine from a previous fermentation
– Fresh herbs for garnish (such as thyme or rosemary)
**Instructions:**
1. Preheat the oven to 400°F (200°C).
2. Peel away the outer layers of the garlic heads, leaving the cloves intact. Using a sharp knife, slice off the top of each head to expose the cloves.
3. Place the garlic heads on a sheet of aluminum foil. Drizzle with olive oil and sprinkle with salt, black pepper, and red pepper flakes if using. Wrap the garlic heads in the foil, creating a sealed packet.
4. Roast the garlic in the preheated oven for about 45-60 minutes, or until the cloves are soft and caramelized. Allow the garlic to cool slightly.
5. Squeeze the roasted garlic cloves out of their skins into a small bowl. Using a fork, mash the garlic into a smooth paste.
6. Add the honey and whey or brine to the mashed garlic. Stir well to combine all the ingredients thoroughly.
7. Transfer the mixture to a clean glass jar, leaving some space at the top. Press down the mixture with the back of a spoon to remove any air bubbles.
8. Cover the jar with a lid, but do not seal it completely. This allows gases to escape during the fermentation process.
9. Place the jar in a dark and warm spot, away from direct sunlight, for 2-3 days to ferment. Check the spread occasionally and press it down to ensure it stays submerged in its own liquids.
10. After the fermentation period, taste the spread. If it has reached your desired level of tanginess, transfer it to the refrigerator to halt the fermentation process. Otherwise, let it ferment for another day or two.
11. Once fermented to your liking, your Roasted Garlic Spread is ready to be enjoyed. Serve it on crackers, bread, or veggies, or use it to elevate your favorite dishes with its rich and complex flavor.
Enjoy the deep umami notes and probiotic benefits that this Fermented Roasted Garlic Spread has to offer. The creamy texture and bold taste of this spread will surely become a staple in your kitchen. Experiment with different herbs and spices to create your unique variations. Make a batch today and elevate your culinary creations with this delicious and healthful spread.