Setting Up A Diy Solar Shower
With warmer weather on the horizon, many of us are eagerly looking for ways to enjoy the great outdoors without sacrificing the comforts of home. That’s where a DIY solar shower comes in handy! Perfect for camping trips, beach days, or even as a sustainable bathing option in your own backyard, a solar shower is a simple and economical way to enjoy a warm rinse wherever you go. In this article, we’ll guide you through the steps of setting up your own DIY solar shower so you can bask in the luxury of hot water, no matter your location.
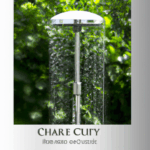
First things first, gather your materials. You’ll need a large plastic or metal container with a spout – think along the lines of a water jug or a repurposed watering can. Make sure the container is dark-colored to absorb as much sunlight as possible. Next, grab a length of hose and a shower head attachment. These can be easily found at your local hardware store or online. Lastly, secure some rope or hooks to hang your solar shower from a sturdy tree branch or other elevated surface.
Once you have all your materials ready, it’s time to assemble your DIY solar shower. Start by drilling a small hole near the top of your container for the hose to fit through. Then, feed the hose through the hole and attach the shower head to the other end. Make sure everything is tightly secured to prevent water leakage. Now, fill your container with water and place it in a sunny spot where it will receive direct sunlight for several hours.
As the sun works its magic, your DIY solar shower will heat up the water inside. The dark container absorbs the sunlight, warming the water naturally without the need for electricity or gas. Depending on the weather conditions, your solar shower can reach a comfortable temperature within a few hours. It’s a sustainable and eco-friendly way to enjoy a warm shower outdoors.
When your solar shower is ready, it’s time to enjoy a refreshing rinse. Hang the container from a tree branch or any other elevated spot using the rope or hooks. You can adjust the height to control the water flow and create your own makeshift shower stall. Simply turn the spout on, and voila – you have a warm, soothing shower experience under the open sky.
For added luxury, consider enhancing your DIY solar shower experience with some extra touches. Bring along biodegradable soap and shampoo to make your outdoor shower feel like a spa retreat. Hang a small mirror nearby for grooming, and don’t forget to pack a fluffy towel and a robe for post-shower comfort. With some music playing softly in the background, you’ll have a delightful outdoor bathing experience that rivals any fancy hotel shower.
After you’ve soaked up the sun and enjoyed your DIY solar shower, it’s important to properly clean and store your setup. Drain any remaining water from the container and hose to prevent mold or mildew buildup. Let the container dry thoroughly before storing it away for future use. You can also dismantle the shower head for easy storage and transportation on your next outdoor adventure.
Incorporating a DIY solar shower into your outdoor routine can elevate your camping trips, beach outings, or backyard hangouts to a whole new level of comfort. By harnessing the power of the sun, you can create a warm and sustainable bathing experience that’s both practical and enjoyable. So, next time you’re headed outdoors, consider setting up your own DIY solar shower for a touch of luxury wherever you go. Happy showering!